Schon lange wollte ich gerne mal Éclairs selber machen und jetzt habe ich endlich mal die Zeit dazu gefunden!
I’ve been meaning to try my own homemade éclairs for a very long time and now I’ve finally found the time to actually do so!
Der Gedanke, einen Brandteig komplett alleine zu machen, hat mich bisher immer etwas abgeschreckt. Aber nachdem ich letztens für Lasagne auch die Béchamelsoße selbst gemacht habe, habe ich mir gedacht, dass Brandteig doch auch nicht so kompliziert sein kann. Und für meinen ersten Versuch ist er mir auch wirklich gut gelungen! Wenn man sich vorher alle Zutaten bereit stellt, geht es wirklich recht einfach.
The thought of making choux pastry completely on my own seemed very daunting to me. But since I’ve recently made my own béchamel sauce for homemade lasagna, I thought that choux pastry couldn’t be much harder. And I think that it turned out quite well for my first try! Make sure to have all your ingredients ready and prepared, and then it should be rather easy.
Je nachdem, wie aufwendig deine Füllung sein soll, würde ich allerdings auf jeden Fall zwei Tage zur Zubereitung einplanen. Aber ich kann dir versichern, dass sich der Aufwand lohnen wird!
Depending on how elaborate you want your filling to be, you will need two days to prepare your éclairs. But I can assure you that it will be very worth it!
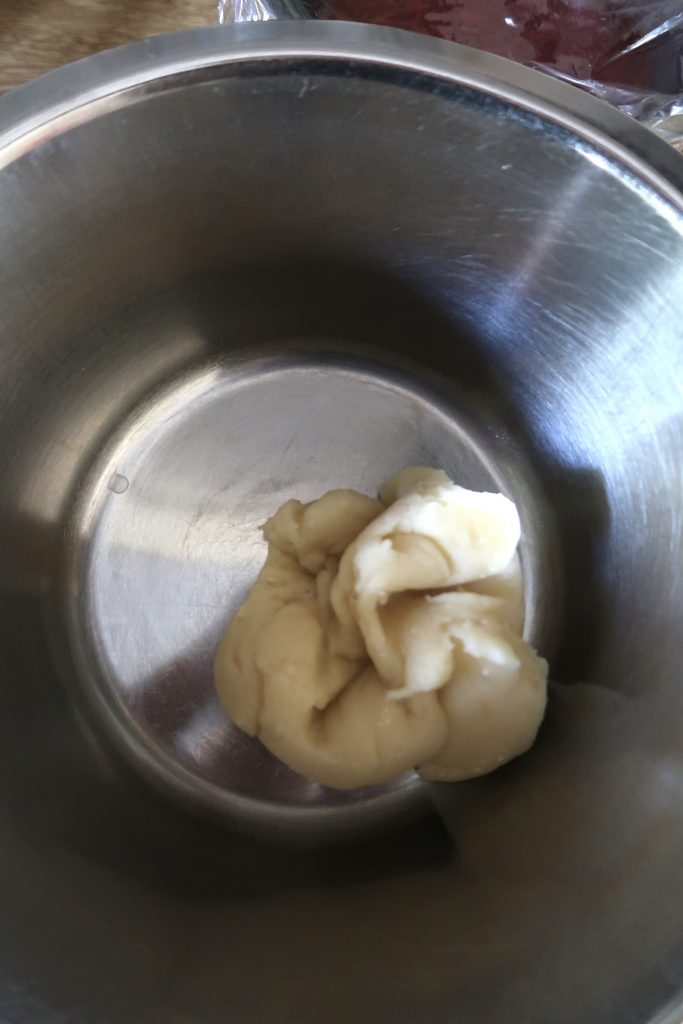
Schritt 1: Crème Pâtissière
Step 1: preparing the crème pâtissière
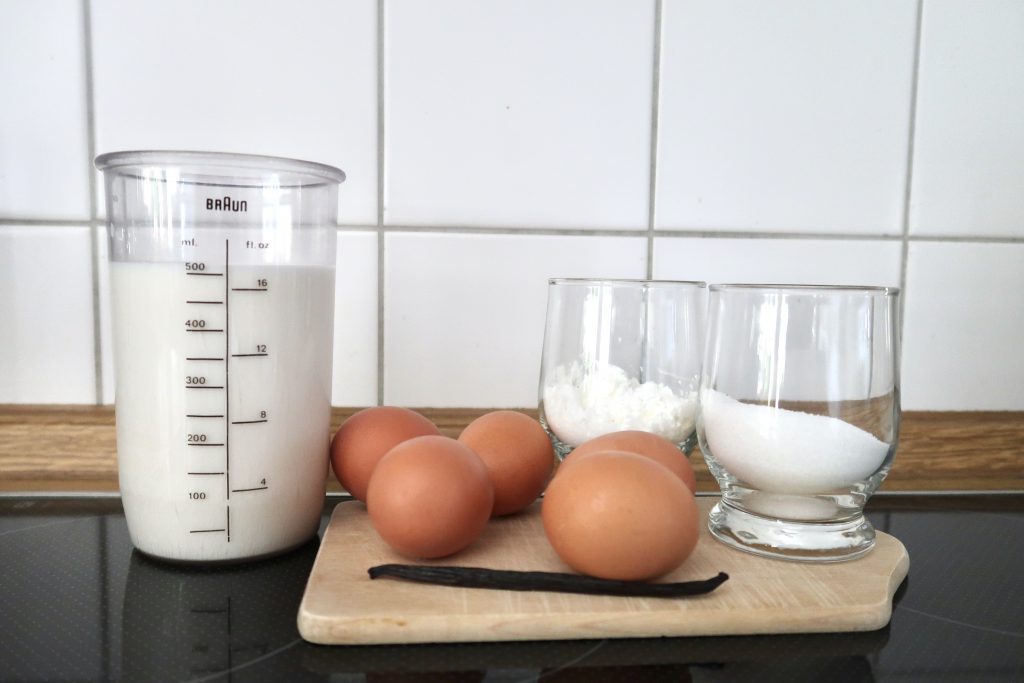
Du benötigst:
- 250 ml Milch
- 3 Eigelb
- 1 Vanilleschote
- 40g Zucker
- 25g Speisestärke
- 1- 2 EL Lemon Curd
You will need:
- 250 ml milk
- 3 egg yolks
- 1 vanilla bean
- 40g sugar
- 25g corn starch
- 1 to 2 tbsp lemon curd
- Die Vanilleschote längs einschneiden und das Mark herauskratzen. Vanillemark, -schote und Milch in einen Topf geben und aufkochen lassen. Vom Herd nehmen und zugedeckt für ein paar Minuten ziehen lassen.
- In der Zwischenzeit Eigelb mit Zucker schaumig rühren, bis die Masse deutlich heller geworden ist. Dann die Stärke unterrühren.
- Nun die Vanilleschote entfernen und die heiße Milch langsam unter die Eimasse rühren. Dies funktioniert besser mit einem Schneebesen als mit einem Handrührgerät, da dann nicht so viel unnötiger Schaum entsteht.
- Die Milch-Eiermasse sofort zurück in den Topf geben und unter ständigen Rührem aufkochen. Weiter rühren und etwa 1 Minute kochen lassen, bis sich eine puddingartige Creme gebildet hat.
- Die Creme in eine Schüssel füllen und sofort direkt an der Oberfläche mit Plastikfolie abdecken, damit sich keine Haut bildet.
- Die Creme zunächt bei Zimmertemperatur abkühlen lassen, dann für mindestens 3 bis 4 Stunden, besser über Nacht, im Kühlschrank auskühlen lassen.
- Nach Geschmack Lemon Curd unter die Creme rühren. Ich empfehle, die Creme nicht zu zitronig zu machen, da auch die Himbeerglasur leicht säuerlich schmecken wird. Bis zur Verwendung kalt stellen.
- Carefully half the vanilla bean and scrape out the pulp. Place vanilla pulp, bean, and the milk in a sauce pan and bring to a boil. Take the pan of the heat, cover with a lid and let sit for a couple of minutes.
- In the meantime, whisk together the egg yolks with the sugar until the mixture has visibly paled and become creamy. Add the corn starch and mix well.
- Remove the vanilla bean from the milk and slowly whisk the milk into the egg mixture.
- Pour the milk-egg-mixture back into the sauce pan and bring to a boil while whisking constantly. Continue whisking vigorously and cook the mixture for approximately one minute, or at least a pudding-like creme has formed.
- Transfer the creme into a bowl and cover immediately with plastic wrap directly on top of the surface so that the creme does not form a skin.
- Let the creme cool at room temperature and place in a fridge for at least 3 to 4 hours, ideally over night.
- Add lemon curd to the cooled creme. I’d recommend not adding to much lemon to the creme, as the raspberry glaze will taste a bit citrusy as well. Store the creme in the fridge until ready to use.


Schritt 2: Himbeer-Glasur
Step 2: preparing the raspberry glaze
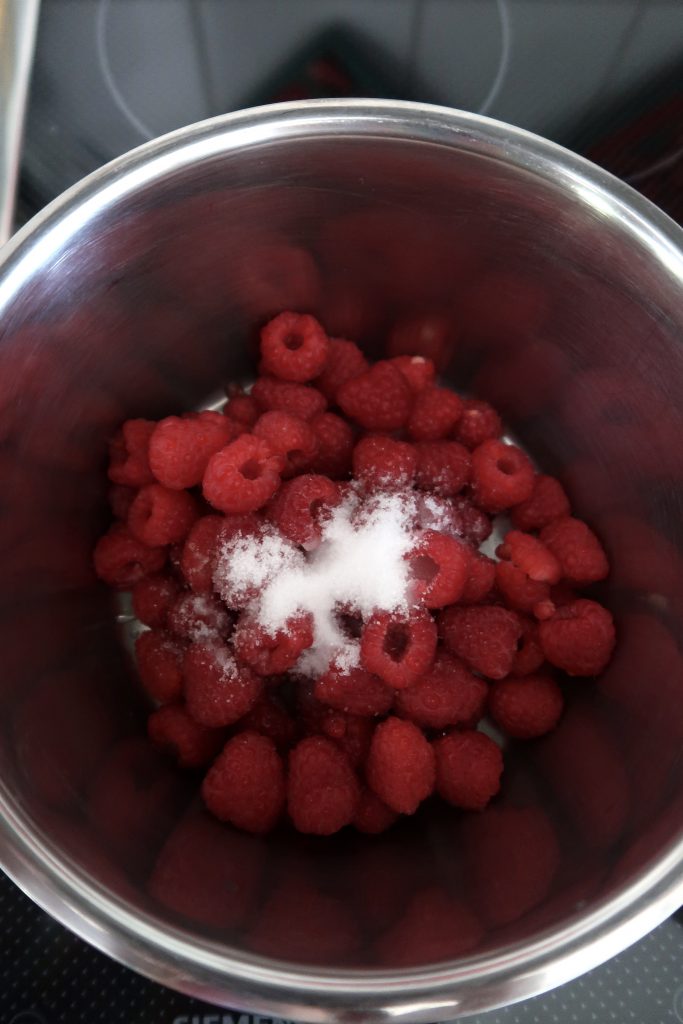
Du benötigst:
- 100g frische Himbeeren
- 1 EL Zucker
- 25g Puderzucker
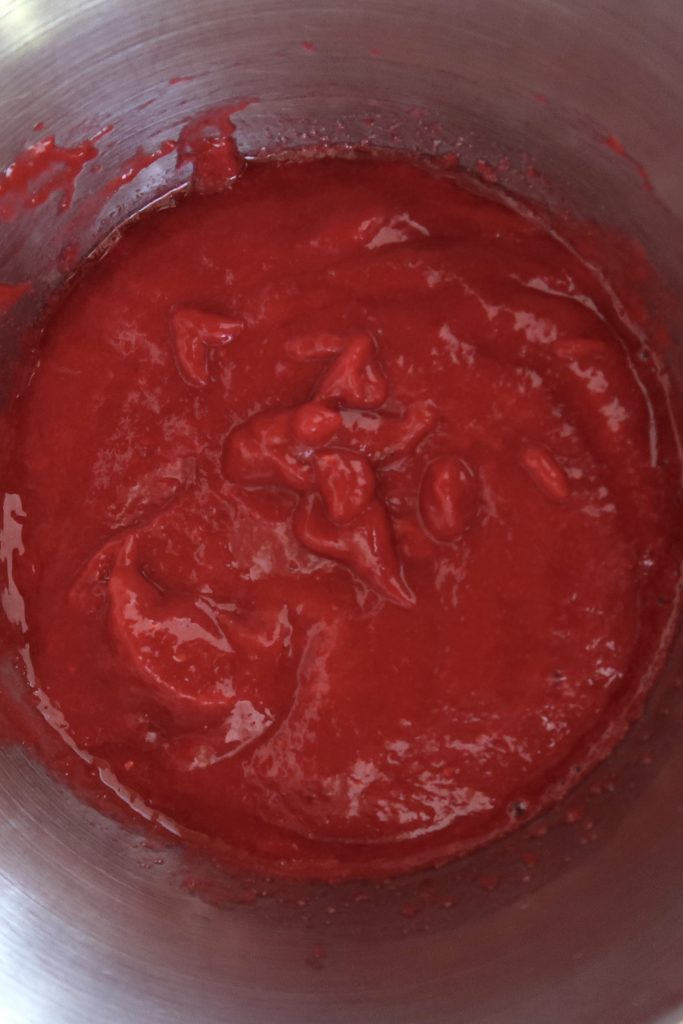
- Die Himbeeren zusammen mit dem Esslöffel Zucker in einem Topf aufkochen lassen. Dabei mit dem Kochlöffel die Himbeeren etwas zerdrücken. Weitere 5 Minuten köcheln lassen, bis das Himbeerpüree eingedickt ist.
- Das Püree durch ein feines Sieb geben. Abkühlen lassen.
- Puderzucker sieben und unter das abgekühlte Püree rühren. Mit Plastikfolie direkt an der Oberfläche abdecken, damit die Glasur nicht aushärtet, und bis zur Verwendung kalt stellen.
You will need:
- 100g fresh raspberries
- 1 tbsp sugar
- 25g powdered sugar
- Place the raspberries together with the tablespoon of sugar in a sauce pan and bring to a boil. Mash the berries with the back of a spoon and continue cooking for 5 minutes, or until the berries have thickened.
- Strain the raspberries through a fine sieve and let cool.
- Sieve the powdered sugar and whisk into the rasberries. Cover with plastic wrap directly at the surface of the glaze to prevent it from hardening. Keep refrigerated until ready to use.
Schritt 3: Éclairs
Du benötigst:
- 125 ml Wasser
- 25g Butter
- 75g Mehl
- 15g Speisestärke
- 3 Eier
- 1 Messerspitze Backpulver
This is what your choux pastry should look like before you start adding the eggs.
- Bevor du anfängst, den Brandteig für die Éclairs zu machen, solltest du dir alle deine Zutaten bereit stellen.
- Mehl und Stärke mischen und bereit stellen.
- 2 Eier in eine Schüssel schlagen, das dritte Ei in einer extra Schüssel verrühren. Beides bereit stellen.
- Wasser und Butter in einem Topf zum kochen bringen. Sobald die Mischung kocht, den Topf von der Hitze nehmen und Mehl und Speisestärke dazu geben. Kräftig umrühren, bis eine glatte Masse entsteht.
- Den Topf zurück auf die Flamme stellen und bei mittlere Hitze den Teig für etwa eine Minute unter ständigem Rühren „abbrennen“.
- Den Teig sofort in eine Rührschüssel geben. Die zwei Eier nach und nach mit einem Knethaken unter den heißen Teig rühren. Von dem dritten Ei nur so viel hinzugeben, bis der Teig stark glänzt und vom Knethaken hängt. Vollständig abkühlen lassen, dann das Backpulver unterrühren.
- Den Teig in einen Spritzbeutel füllen und eine Öffnung von 2cm Durchmesser abschneiden.
- 12 etwa 8 cm lange Streifen auf ein Backpapier spritzen und bei 200 Grad Celsius etwa 25 Minuten backen. Während der ersten 15 Minuten den Backofen nicht öffnen, da die Éclairs sonst zusammenfallen. Die Éclairs sind fertig gebacken, wenn sie sich fest anfühlen.
- Sofort einen Deckel von den Éclairs abschneiden und erkalten lassen.
Step 3: baking the Éclairs
You will need:
- 125 ml water
- 25g butter
- 75g flour
- 15g corn starch
- 3 eggs
- 1 pinch of baking powder
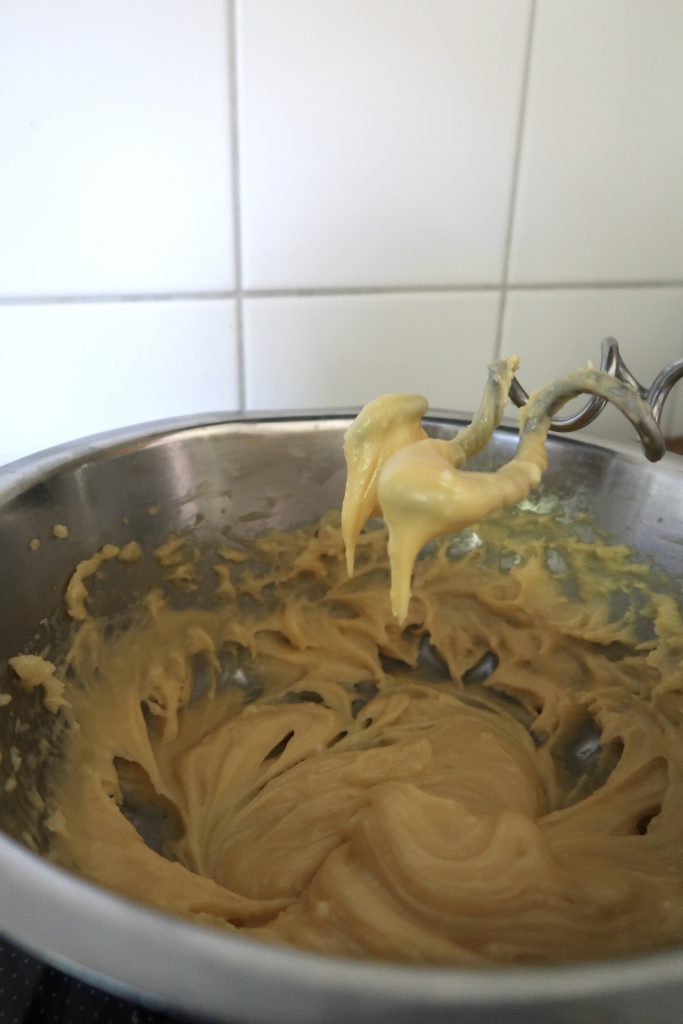
The finished choux pastry should be very shiny.
- Before you start making the choux pastry, make sure to have all ingredients prepared and ready.
- Mix the flour and the corn starch in a bowl and set aside.
- Crack two eggs in a bowl and the third one in a separate one. Set both aside and ready.
- Place water and butter in a sauce pan and bring to a boil. Remove from heat and add flour and corn starch. Mix vigorously until well combined and lump-free.
- Place the pan back onto the heat, lower the flame a bit, and continue stirring for about a minute.
- Transfer the dough into a mixing bowl and add the two eggs one at a time while the dough is still hot. Add a bit of the third egg at a time until the dough is very shiny. Let cool completely, then add the baking powder.
- Place the dough into a pastry bag and snip of an opening of about two centimeters in diameter.
- Pipe 12 strips that are roughly 8 cm long onto baking paper and bake at 200 degrees Celsius for about 25 minutes. Make sure that you don’t open the oven in the first 15 minutes of baking so that the éclairs don’t collapse. The éclairs are done when they feel firm to the touch.
- Cut the éclairs in half while they’re still hot, then let cool completely.

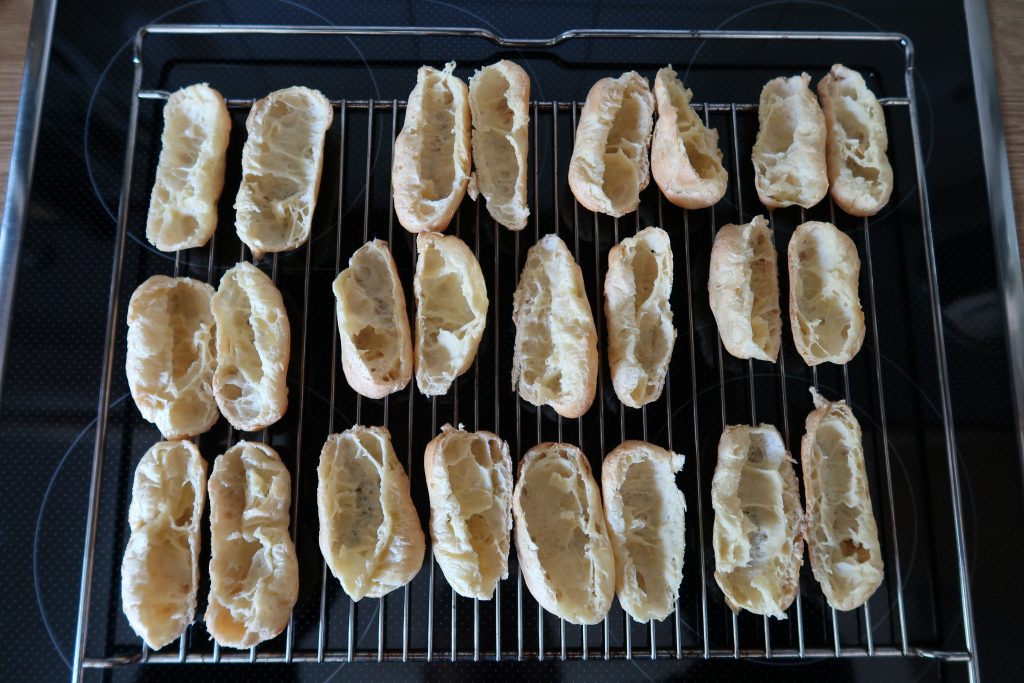
Wet your fingers to smove out any blemishes in your piped éclairs.
Schritt 4: Dekorieren und füllen
Step 4: filling and decorating
Du benötigst:
- 12 Éclairs
- Crème pâtissière
- Himbeerglasur
- frische Himbeeren
- getrocknete Blüten
You will need:
- 12 éclairs
- crème pâtissière
- raspberry glaze
- fresh raspberries
- dried, edible flowers

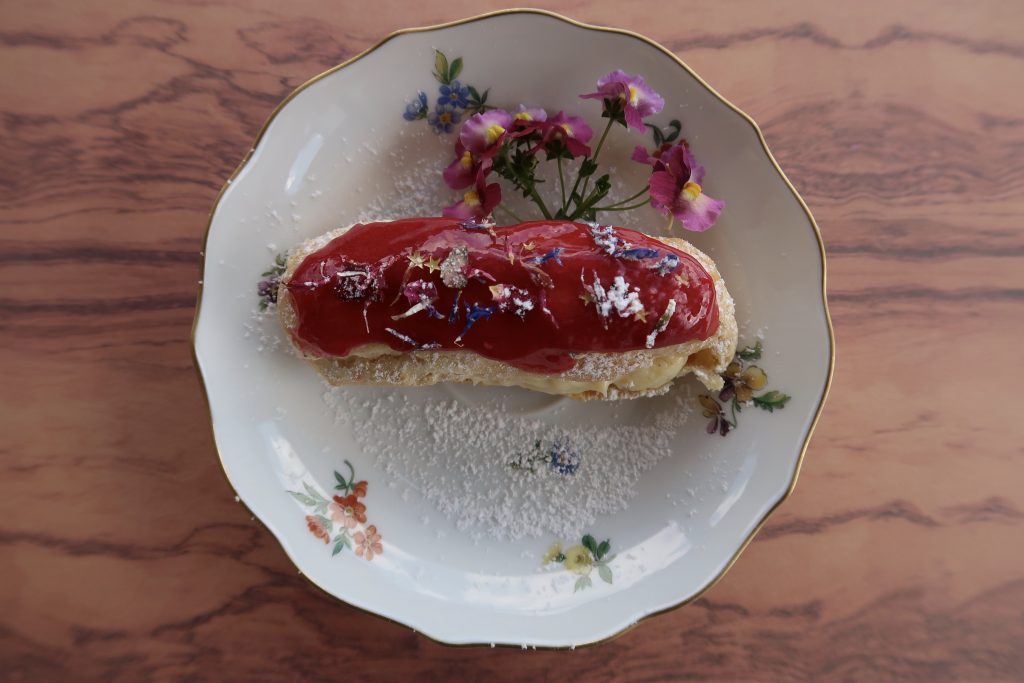
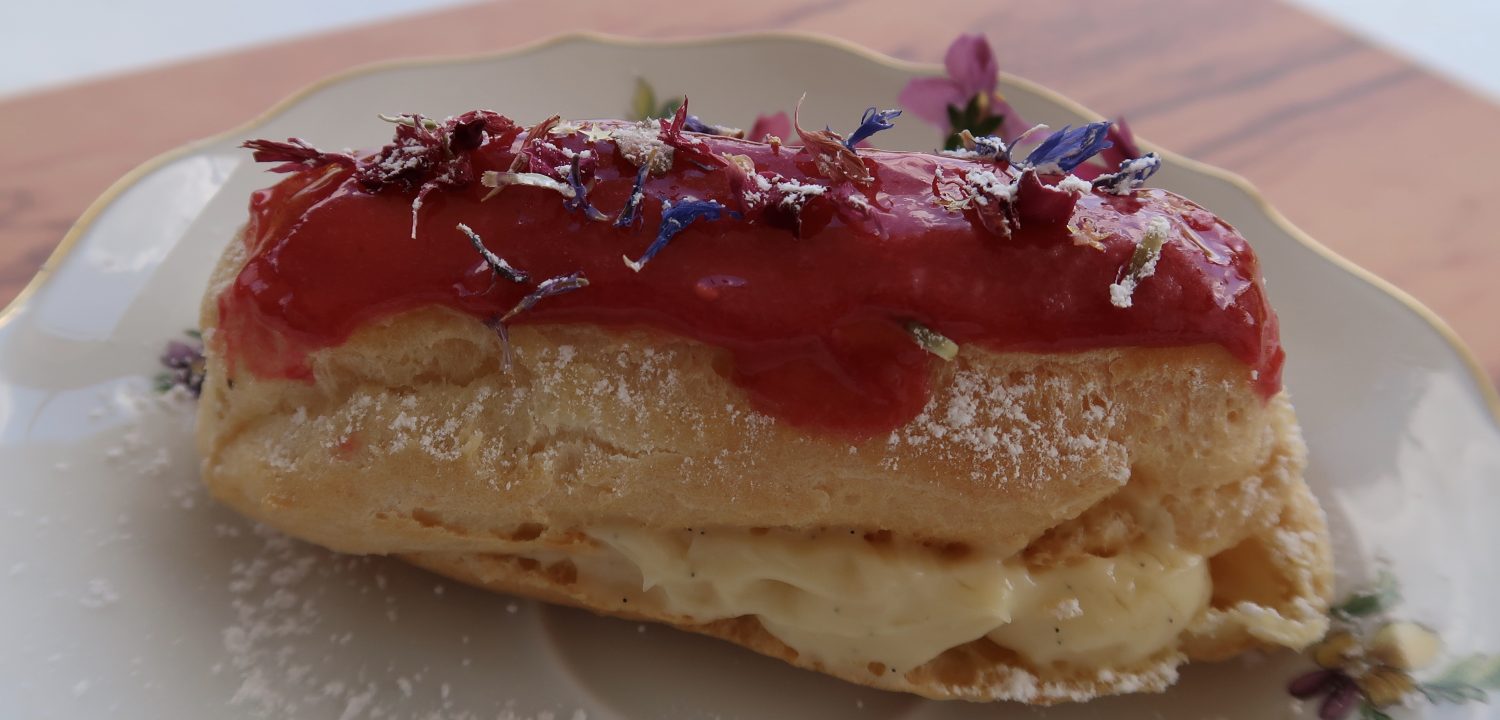
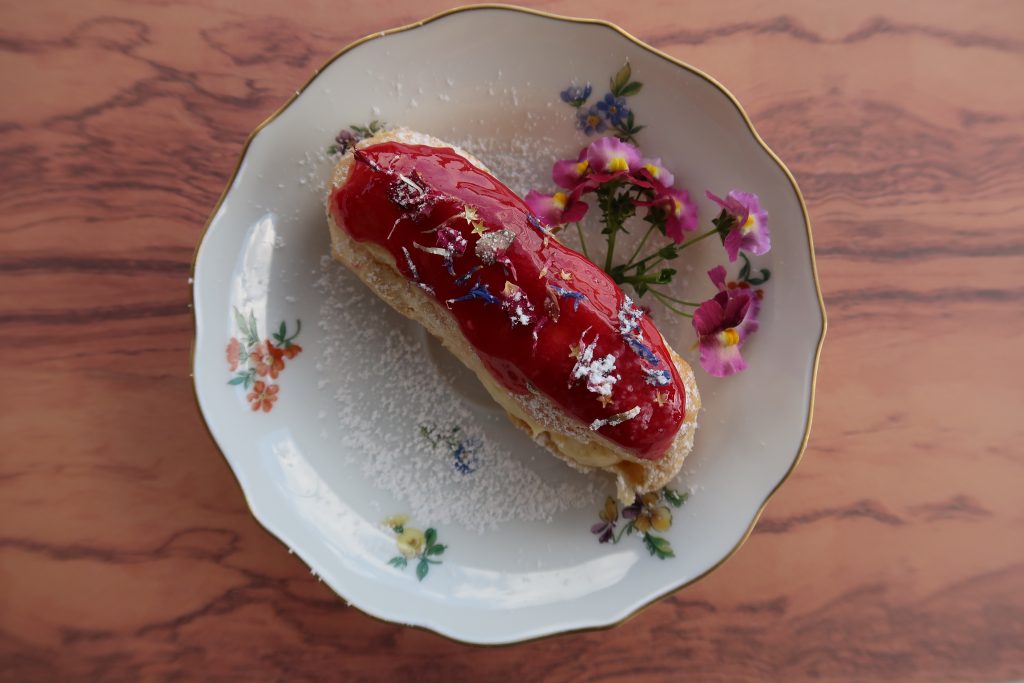
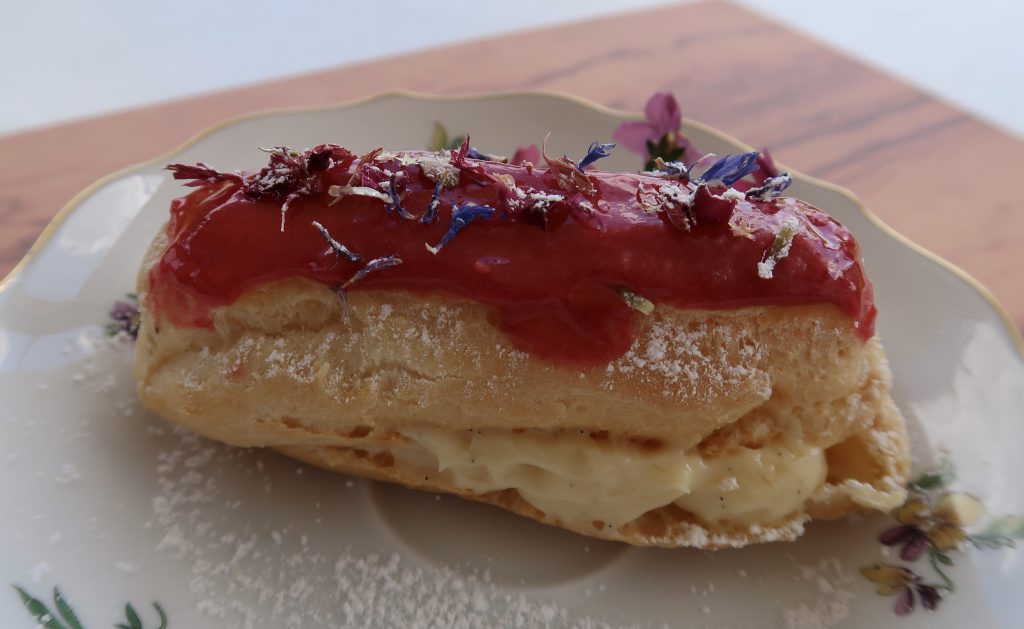
- Die Deckel der Éclairs mit Himbeerglasur bestreichen. Getrocknete Blüten und sonstiges Dekor (ich habe noch goldene, essbare Sterne verwendet) darüber streuen und zum Trocknen beiseite stellen.
- Crème pâtissière in einen Spritzbeutel mit Sterntülle füllen und die unteren Hälften der Èclairs damit befüllen. Frische Himbeeren vorsichtig in die Crème eindrücken und Deckel aufsetzen.
- Bis zum Servieren kalt stellen, eventuell mit Puderzucker bestäuben.
Lass es dir schmecken!
- Coat the lids of your éclairs with the raspberry glaze. Sprinkle with dried, edible flowers and other decorations (I’ve used some edible, golden stars as well) and set aside to dry.
- Fill a pastry bag fitted with a star-shaped nozzle with the crème pâtissière and pipe into the bottom halves of your éclairs. Carefully place your fresh raspberries on top of the crème and finish with your decorated lid.
- Keep refrigerated until ready to serve. You can also dust them with some icing sugar.
Enjoy!